Sqwarq's DetectX is an amazing shareware security tool that checks your Mac for malware, keyloggers, adware and potentially unwanted programs.
Recent updates to DetectX add the ability for administrators to initiate a scheduled scan from a management platform.
Neat! Let's integrate it with Jamf Pro to scan and report on your fleet.
Developer Phil Stokes is currently working on a Swift re-write of the app named, appropriately, DetectX Swift. To quote Phil,
DetectX Swift is an on-demand security and troubleshooting tool that uses a combination of hardcoded search definitions along with live updates and predictive heuristics to detect both known and unknown threats and issues.
After a feature request and some discussion, Phil was kind enough to add a command-line interface for DetectX Swift, allowing administrators to run non-interactive scans on their devices. The initial command-line interface was added in v0.108 of DetectX Swift. The latest release, v.110, expands the capabilities of the non-interactive scan to search for suspect files in all users' home directories and elsewhere on the system.
As root (via sudo), you can initiate an administrative scan for all users from the command line by using the -a flag. For example:
sudo /Applications/DetectX\ Swift.app/Contents/MacOS/DetectX\ Swift search -a
You'll get back a nicely-formatted scan result to stdout:
DetectX Swift
Mon 11 Dec 2017, 09:26:52 -0500
Searching...
Search includes users:
haircut
studentuser
testuser
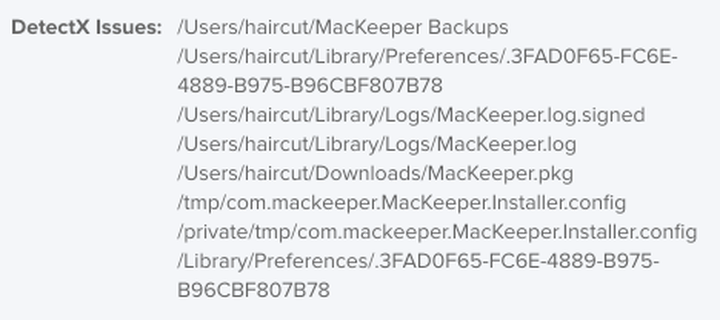
/Users/haircut/MacKeeper Backups
/Users/haircut/Library/Preferences/.3FAD0F65-FC6E-4889-B975-B96CBF807B78
/Users/haircut/Library/Logs/MacKeeper.log.signed
/Users/haircut/Library/Logs/MacKeeper.log
/Users/haircut/Downloads/MacKeeper.pkg
/tmp/com.mackeeper.MacKeeper.Installer.config
/private/tmp/com.mackeeper.MacKeeper.Installer.config
/Library/Preferences/.3FAD0F65-FC6E-4889-B975-B96CBF807B78
8 files found.
Uh-oh – looks like I picked up MacKeeper!
We'll set up two policies, a script, a Smart Group and an Extension Attribute to generate and collect these scan results and make them available within Jamf Pro.
Integration Support Files
All the files necessary for integration with Jamf Pro are available in my detectx-jamf repo on GitHub. Go ahead and download these files so you can follow along.
Package DetectX Swift for Deployment
Download the latest DetectX Swift beta.
DetectX Swift is delivered as a disk image containing the DetectX Swift.app bundle. You'll need to package that up to install the app to a known location. It's up to you where to put it. /Applications/Utilities is a good place which will allow your users to easily find DetectX Swift if they'd like to run it themselves.
While specifics on packaging apps is outside the scope of this guide, I like munkipkg for packaging apps. Any tool – including Jamf Composer – will work.
Once packaged, upload your DetectX Swift package to your Jamf Pro distribution points.
Create a Policy to Install DetectX Swift
Rather than blindly deploy DetectX Swift to all my clients, I prefer to install it on demand, when a client needs it. The run-detectx-search.py script in my detectx-jamf repo will take care of this dependency resolution.
Create a new policy and name it Install - DetectX Swift. Set the only trigger to "Custom" and enter the custom trigger "install_detectx". Set the Frequency to "Ongoing", since we want this policy to be available whenever we need it.

In the Packages tab, add your DetectX Swift package. Do not enable the "Update Inventory" option in the Maintenance tab – we'll handle that later.
Set an appropriate Scope; I make the policy available to all my managed clients but your use case may differ.
Save the policy.
Add the DetectX Script to your Jamf Pro Server
Open the run-detectx-search.py script downloaded from my detectx-jamf repo. The included variable values on lines 14-23 should serve as suitable defaults.
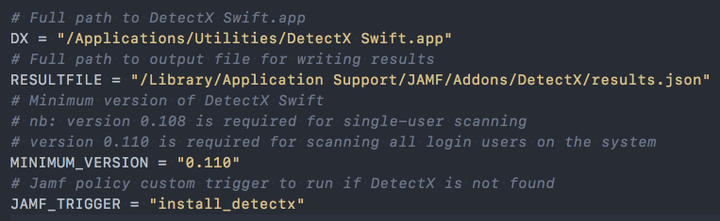
If you've changed the installation location of DetectX Swift, or configured a different custom trigger for your "Install - DetectX Swift" policy, make sure to set those values in the script.
By default, run-detectx-search.py uses DetectX Swift's -j flag to output the results of the search in JSON format to /Library/Application Support/JAMF/Addons/DetectX/results.json. Placing the results file within /Library/Application Support/JAMF/ is a best practice, as it will ensure the file is deleted if you ever need to remove the Jamf framework.
run-detectx-search.py will determine if DetectX Swift is installed at the specified location. If not, it will attempt to install the app by calling the custom trigger you provide. Building dependency resolution into the script helps ensure it is able to run correctly in case a user – or malicious app! – removes DetectX Swift.
The script will also verify that the installed version of DetectX Swift is at least 0.110.
After making any customizations, add a new script to your Jamf Pro Server. Use the filename, run-detectx-search.py, as the "Display Name" of the script. Copy the contents of your run-detectx-search.py file into the Script Contents textbox.
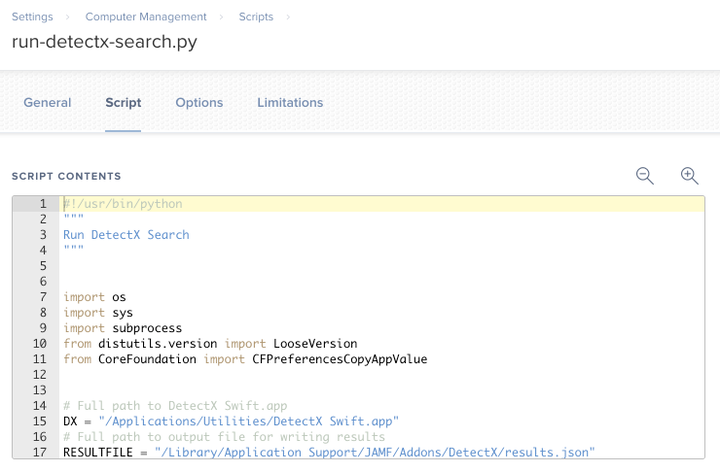
Save the script.
Add an Extension Attribute to Collect DetectX Search Results
After running a scan, we need to collect the results and associate them to a computer record within Jamf Pro. We'll use an Extension Attribute to read the /Library/Application Support/JAMF/Addons/DetectX/results.json file generated by run-detectx-search.py.
Included in the detectx-jamf repo is the DetectX Issues.xml file, which is a ready-to-upload Extension Attribute. Simply navigate to Management Settings > Computer Management > Extension Attributes then click the Upload button. Select the DetectX Issues.xml file on your computer and upload it. Review the settings for the Extension Attribute, particularly "Inventory Display" categoy which controls where the Extension Attribute results are displayed when viewing a computer object.
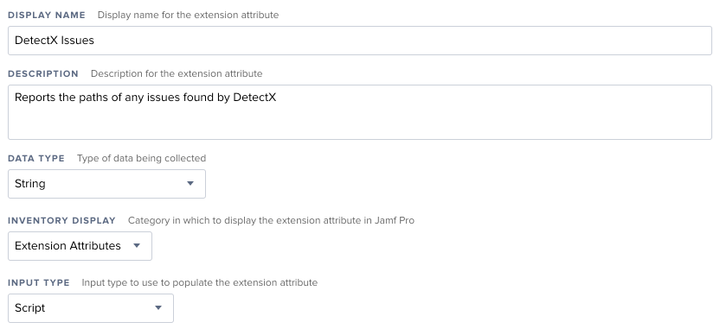
Save the Extension Attribute.
If you've changed the default location of the search results file in run-detectx-search.py, or prefer to create and configure the Extension Attribute manually, EA-DetectX-Issues.py is included in the detectx-jamf repo. Edit the script and copy it to an Extension Attribute.
Create a Policy to Run DetectX Swift Searches
With the script in place, we need to create one more policy to schedule DetectX scans on your fleet.
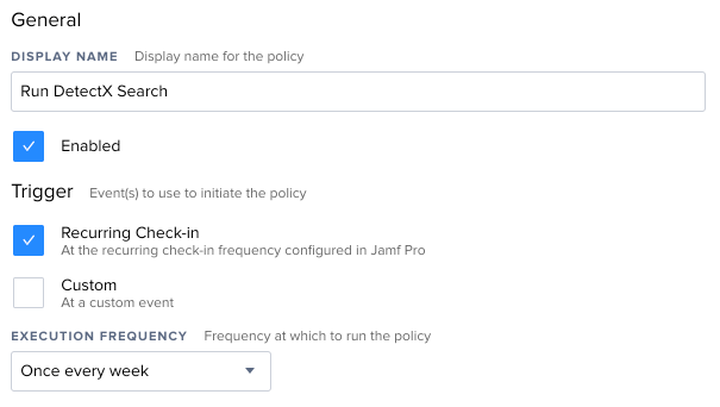
Create a new policy and give it a suitable name, like "Run DetectX Search."
Set the Trigger to "Recurring Check-in," and the Frequency to "Once per week." If your environment demands more frequent or less frequent scanning, adjust the frequency accordingly. I will, however, caution against an "Ongoing" frequency so as not to inflate your Jamf Pro database with excessive inventory reports.
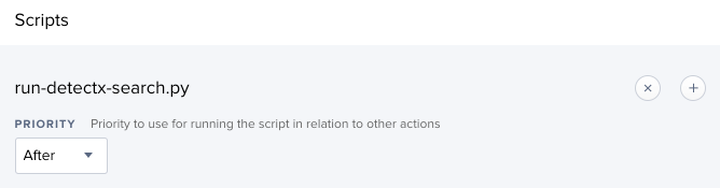
In the Scripts tab, add the run-detectx-search.py script. No parameters are necessary. Since the script is the only action of the policy, the default priority of "After" is sufficient.
In the Maintenance tab, ensure "Update Inventory" is checked. This will ensure the computer inventory is updated – and the "DetectX Issues" Extension Attribute is populated – after the search is complete.
Set a Scope for the policy. "All Managed Clients" works well, but you may desire to further restrict the availability depending on your needs.
Create a Smart Group of Infected Machines for Alerts
Finally, we'll create a Smart Group to alert us when a DetectX search finds issues on a computer.
Add a new Smart Group named "DetectX - Issues Found." I enable the "Send email notification on membership change" option so that I'm emailed when DetectX finds issues on a client.

Add two criteria:
You may need to click "Show Advanced Criteria" to display the "DetectX Issues" Extension Attribute.

Save the Smart Group.
Interpreting the Extension Attribute
If DetectX finds potentially malicious files, they will be listed in the "DetectX Issues" Extension Attribute.
If the search completes but no issues are found, the Extension Attribute will be set to None.
If the search has not yet completed, or an issue occurred when attempting a search, the Extension Attribute will be blank.
Conclusion
That's it! You should now have your clients running background DetectX searches on a regular schedule. When results are found, the infected clients will be added to the "DetectX - Issues Found" Smart Group for reporting.
From here, you have a number of options. Here are a few ideas:
- Integrate the Smart Group membership change emails with your ticketing system for technicians to assist with remediation.
- Scope a Configuration Profile to the "DetectX - Issues Found" Smart Group to migrate infected machines to a different network that disallows access to sensitive corporate systems.
- Scope a Policy to the affected computers that uses jamfHelper to alert the user and guide them through removing malicious files with the DetectX Swift GUI. Be conscious of "security fatigue" – users often respond better to direct communication.
Or, just periodically check the group membership and remediate as you see fit.
Hopefully the increased visibility into malicious files on your fleet will prove useful!