In a post-imaging, DEP-only world, maintaining your organization's computer naming convention can be a challenge.
We can ease the pain with a little bit of Python, some clever interaction with
the jamf binary, and a remotely-hosted Google Sheet.
The problem
With DEP enrollments, your Macs are assigned a default computer hostname in the
format <user's first name>'s <Mac model>. DEP provides no facility to set
computer names, and Jamf Pro's PreStage Enrollments are similarly limited.
You wind up with your devices having very consumer-centric names like "Susie's MacBook Pro" and "Dave's iMac". Hostnames like that can cause compatibility issues in some environments, and often don't fit an organization's device naming convention.
Helpfully, the jamf binary includes a setComputerName verb to aid in – as it
says on the tin – setting the computer's name.
The -name flag will set the computer name to whatever you provide.
$ sudo jamf setComputerName -name ITDEPT-MAC14
Set Computer Name to ITDEPT-MAC14
The -useSerialNumber and -useMACAddress flags will set the computer name to
either of those values.
$ sudo jamf setComputerName -useMACAddress
Set Computer Name to 724f43aa12f
You can also create more complex computer names with the optional -prefix and
-suffix flags.
$ sudo jamf setComputerName -useMACAddress -prefix "Mac-" -suffix "-ITDEPT"
Set Computer Name to Mac-784f435ee12d-ITDEPT
These options may be sufficient for you – so feel free to tune out now!
However, your organization's naming scheme might include information that's not easily discernable from the device. In my case, our hostnames include the name of the department who owns the device and the asset tag.
One workaround is to script a GUI prompt for an end user or IT staff to manually
enter the correct computer name. You can then feed this input to jamf setComputerName -name <input> – but that's error-prone and cumbersome to the
user.
I want this automated!
The -fromFile flag
The jamf binary's setComputerName command also includes the -fromFile flag.
From the jamf help:
-fromFile
The path to a CSV file containing the computer's MAC Address or Serial Number followed by the desired name
This little gem allows you to provide the path to a CSV file containing device serial numbers or MAC addresses and those devices' associated desired hostnames.
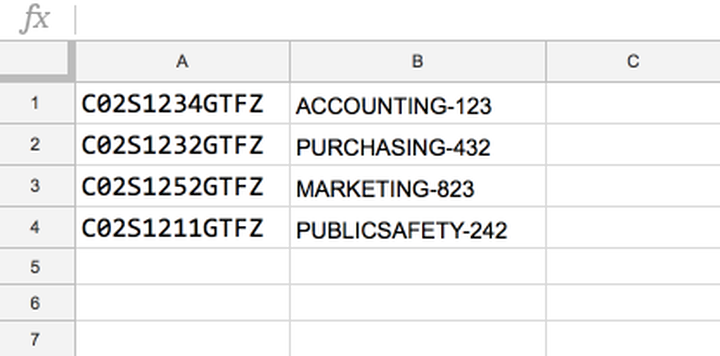
Some experimentation showed the required format of the CSV file is:
<serial number or MAC address>,<desired hostname>
A complete CSV using serial numbers might look like:
C02S1234GTFZ,ACCOUNTING-123
C02S1232GTFZ,PURCHASING-432
C02S1252GTFZ,MARKETING-823
C02S1211GTFZ,PUBLICSAFETY-242
After saving that CSV file to /var/tmp/serials.csv for example, you can then
run:
sudo jamf setComputerName -fromFile /var/tmp/serials.csv
If the device running this command has a serial number listed in the specified
CSV file, the jamf binary will find it and set the computer name to the
provided value. If the serial number (or MAC address) of the device is not
found in the specific CSV file, the jamf binary will print an error and the
computer name remains unchanged.
Using the CSV file allows you to assign more complex hostnames to your devices, but that CSV file must exist on the client in order to be used. You could create a policy to install the file on your fleet, but this is very messy and would quickly lead to stale data.
Instead, we'll host the CSV on a web server in a central location. This way, you can easily update the data without having to re-install any files on your clients.
For ease, we'll use a Google Sheet.
Create a Google Sheet
You'll need a Google account with the Drive service available. If your organization uses G Suite, you're good to go, though any Google account will work.
Create a new Google Sheet document. Populate column A with your computer serial numbers or MAC address, and column B with their associated desired hostnames.
Click "Share" in the upper right corner, then click "Advanced" in the lower right of the modal Share window. Under the "Who has access" heading, you'll likey see "Private - Only you can access".

Click the "Change..." link here, then select the Link Sharing option "On - Anyone with the link". Confirm the Access is set to "Anyone Can view", then click Save.
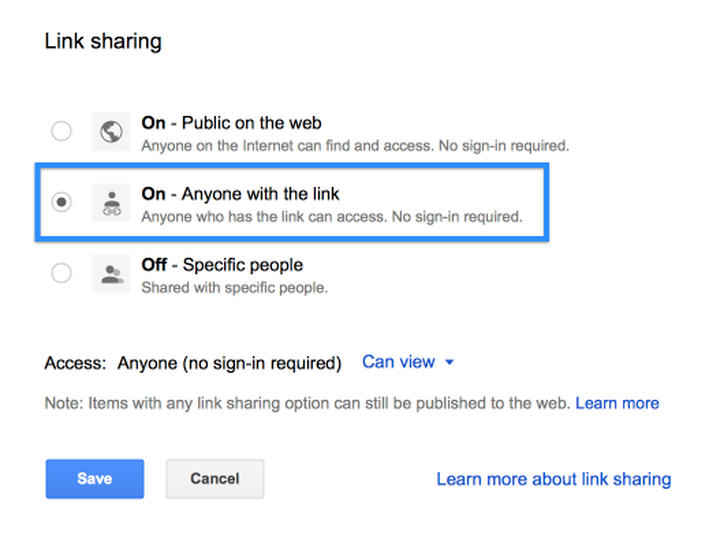
Since serial numbers and MAC addresses could be considered somewhat sensitive information, these settings will reduce the availablity of the data while still allowing your clients to access the sheet.
Finally, note your Google Sheet's document ID. It's the long string of seemingly-random characters in the URL shown when editing the Sheet.

Add a script to Jamf Pro
In your Jamf Pro server, visit Management Settings > Computer Management > Scripts and create a new script.
Paste the contents of rename-computer.py into the Script Contents area.
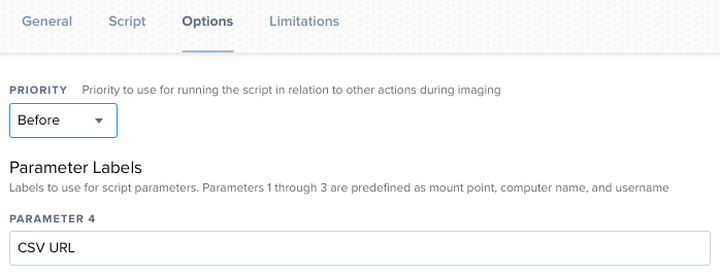
Under the Options tab, set Parameter 4 to "CSV URL".
The rename-computer.py script downloads the CSV file from Google Sheets (or
any other web server you where you host it), saves it to a temporary location on
the client, then runs the jamf setComputerName... command with the -fromFile
flag.
Create a policy to rename computers
Create a new policy to run the rename-computer.py script. Give the policy an
appropriate name, like "Rename Computer". Configure the "Scripts" payload by
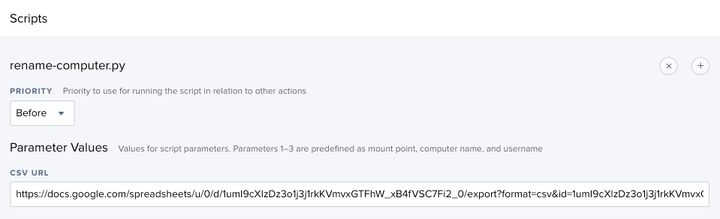
adding the rename-computer.py script. We'll set the "CSV URL" parameter to
point to your remote-hosted CSV file.
If you're using the Google Sheet outlined above, we need to construct a URL to output the Sheet in CSV format.
https://docs.google.com/spreadsheets/u/0/d/<document ID>/export?format=csv&id=<document ID>&gid=0
Remember the Google Sheet document ID we noted earlier? Insert it in the URL
above to replace both <document ID> placeholders. Paste this URL into the "CSV
URL" field of the policy's script configuration.
Configure the "Maintenance" policy payload to "Update Inventory" so the new computer name is reflected in your inventory.
Set an appropriate scope for the policy, and a pertinent policy trigger. You could make the policy available in Self Service, or set it to run once at startup – whatever makes sense for your environment. I'm running the script at the end of a DEP enrollment to automatically rename the computer after Setup Assistant completes.
When a client runs the script, if its serial number or MAC address is found in the CSV file, the device's name will be updated to match the provided value. If the device's serial is not found, the script returns a non-zero exit code and Jamf Pro will record a policy failure. The logs for that policy failure should report exactly why it failed.
A word on sensitive data
As mentioned, you may classify device serial numbers or MAC addresses as sensitive data. If this is a concern for you or your environment, you should forego the Google Sheet option and instead host your CSV on a web server you control.
Conclusion
Presto – that's it!
When you add new devices to your inventory, or need to reassign hostnames, simply update your Google Sheet (or self-hosted CSV file). No need to change anything in your Jamf Pro server – since our script references the external CSV it's always up to date.
I hope you find this workflow helpful.